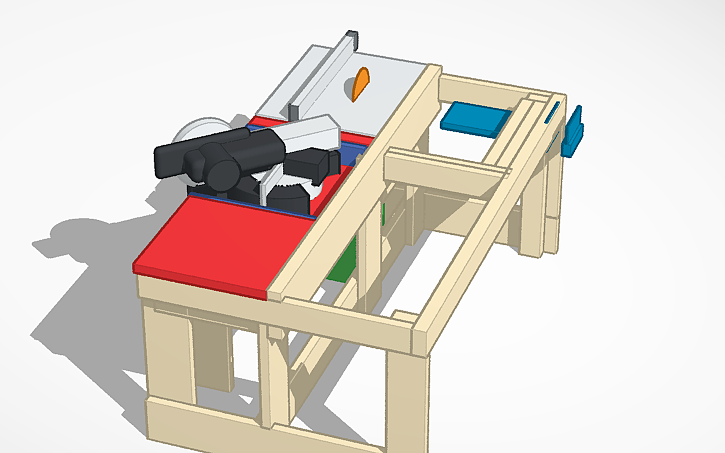
Originally built for a communal workshop used by lots of people, this bench proved it could take abuse and stay true. We’ve now open-sourced the design so anyone can build, adapt, and improve it. It uses reclaimed scaffolding boards, sacrificial plywood skins for a dead-flat surface, and modular bays for a table saw, flip-up mitre saw, and router—ready for future drawers, vises, and clamps.
https://www.tinkercad.com/things/5wgHGDENTJ7-woodworking-workbench-2000x1220x880mm
Specs at a glance
Hardware highlights: Ordinary kitchen hinges (router lid), bathroom latches (flip-box lock), threaded inserts + bolts (modular bays)
Footprint: 2000 mm × 1220 mm (ideal for handling 4′×8′ sheets)
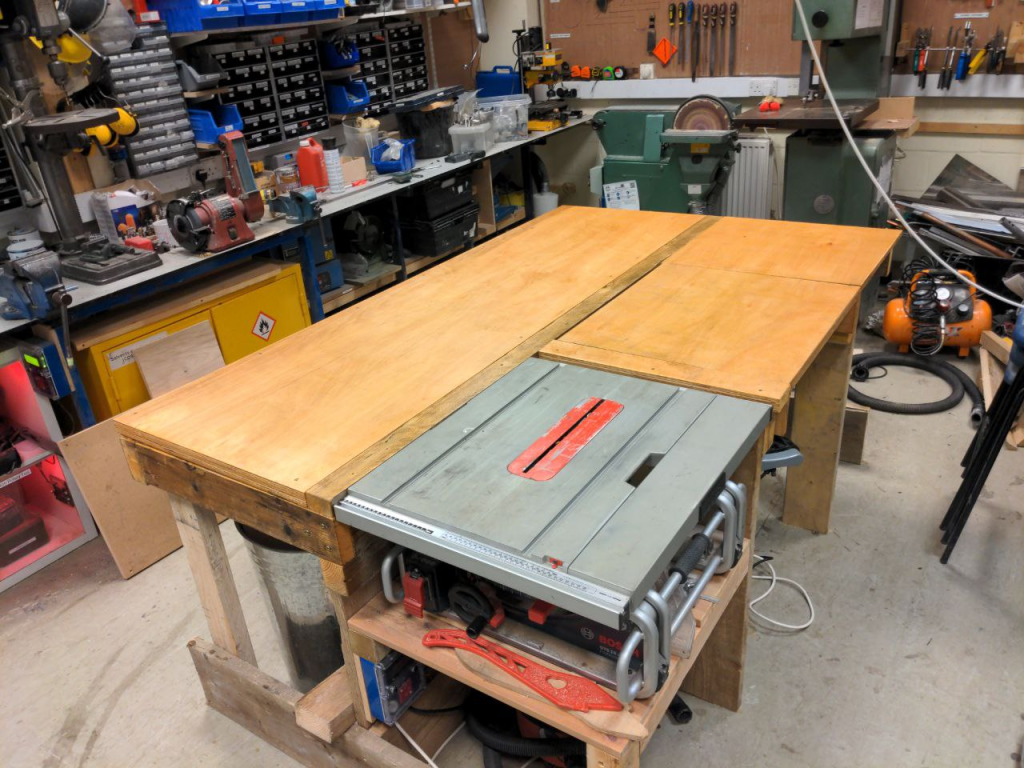
Top: Sacrificial plywood skins; quick to replace; dead-flat working surface
Integrated tools: Table saw (stand set 5–10 mm low for shimming), flip-box mitre saw, hinged-lid router table
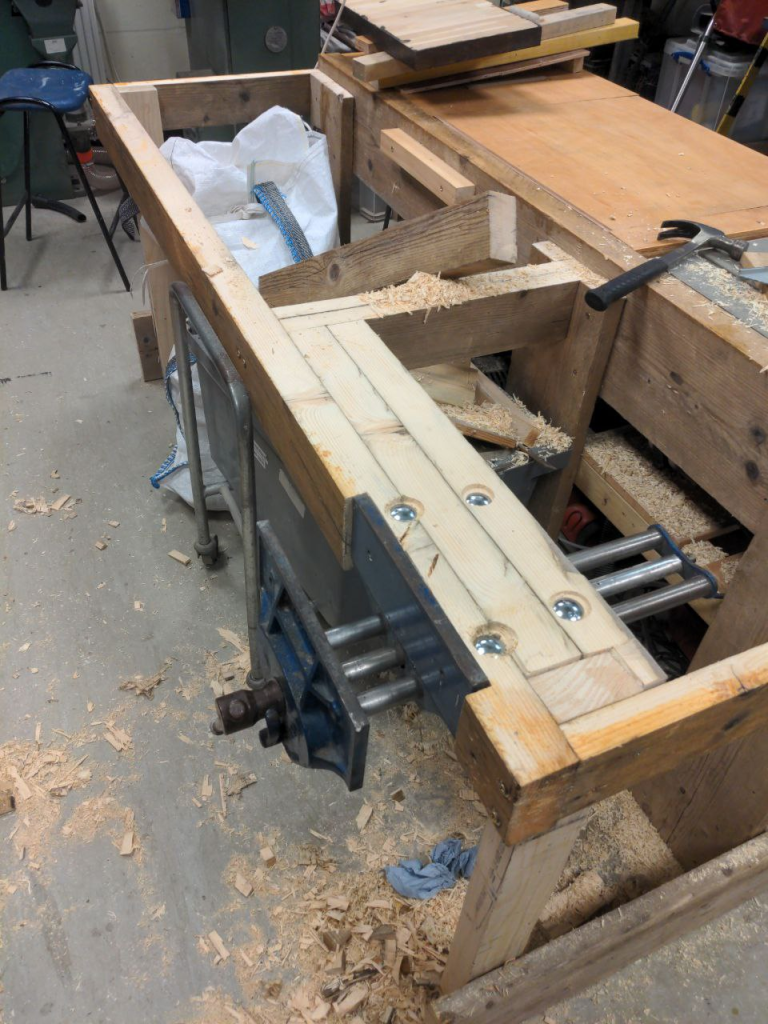
Frame timber: Reclaimed scaffolding boards — 60 mm and 38–40 mm thick stock
Plywood: 1× full 18 mm 4′×8′ sheet (doubled where noted) + offcuts of 18 mm & 25 mm for the mitre-saw tray and router table
Materials & hardware
Reclaimed boards
- 2 × 60 mm thick × 2.4 m (stiff perimeter & leg cores)
- ~6 × 38–40 mm thick × 2.8–3.2 m (rails, stretchers, cross-members)
Sheet goods
- 1 × 18 mm ply 4′×8′ (1220 × 2440 mm) — double up (laminate) for the flat section beside the table saw
- Offcuts 18 mm & 25 mm ply — mitre-saw flip-tray and router plate/lid
Hardware (suggested)
- Coach screws / structural screws (6–8 mm dia), washers
- Pocket-hole screws (for non-structural fixings)
- 8 × threaded inserts M8/M10 + matching bolts (for bay modules)
- 4–6 × leveling feet or locking casters (M12 studs work well)
- 2 × kitchen hinges (router lid)
- 2 × bathroom latches (flip-box locks)
- Wood glue, construction adhesive
- Optional: T-track, M6/M8 tee-nuts for clamps/fixtures
Tools
- Circular saw or track saw, table saw (once installed), drill/driver, chisels, flush-trim router bit, square, straightedge, clamps
Build Stages
Precut & prep
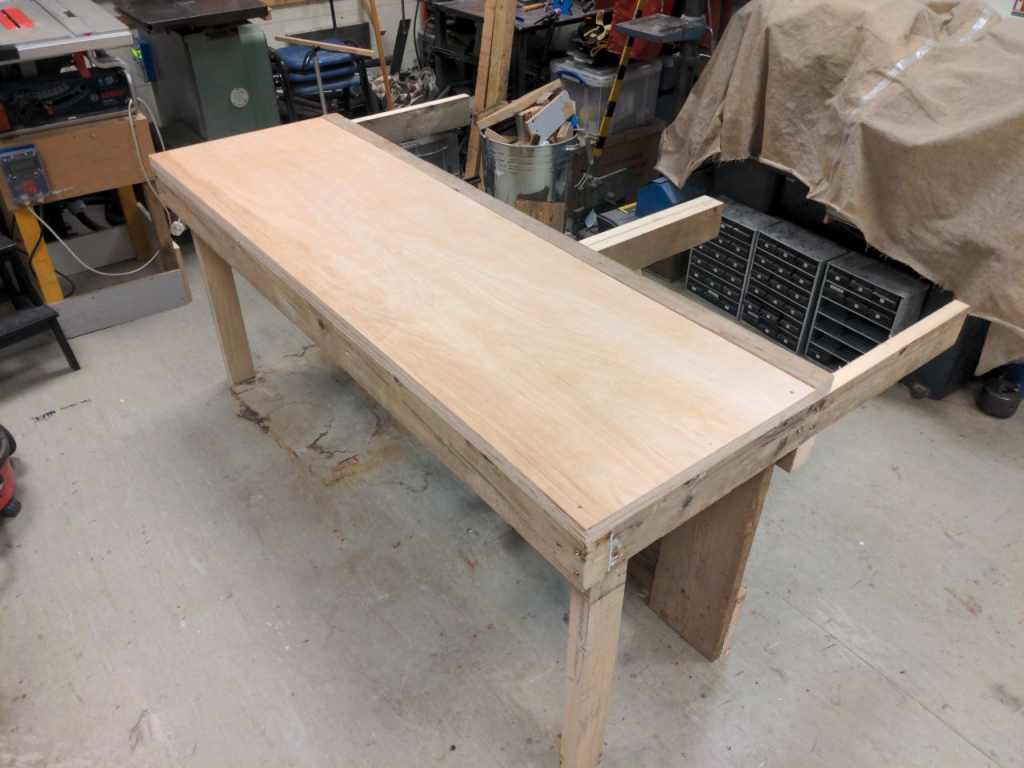
Break down boards and ply; laminate the 18 mm sheet into a double panel for the flat section.
Base frame
Assemble 2000 × 1220 mm rectangle from scaff boards; add legs with leveling feet. Check square.
Stretchers & cross-members
Install mid/lower stretchers and top cross-members, leaving bays for table saw, flip-mitre, and router. Add threaded inserts for future drawers.
Table-saw bay
Build a stand 5–10 mm lower than bench top; drop saw in and shim flush to the laminated flat panel.
Mitre-saw flip-box
Build tray, set pivot at midpoint between box bottom and saw table top; fit simple bathroom latches.
Router section
Cut recess; fit kitchen-hinge lid or plate; ensure it sits flush (shim as needed).
Sacrificial skins
Screw down ply skins; pre-mark/grid screw locations for easy future swaps.
Tune & finish
Shim saw and flip-box dead-flat; add power/dust, optional drawers, and edge seal.